
Table of Contents
- Overview
- Considerations
- Benefits
- Limitations
- Cost
- How to create a Self-Managed Shippit Carrier Connection
- Understanding and Using Shippit
- International Shipments and Customs Information with Shippit
- Disconnecting an existing Self-Managed Shippit Carrier Connection
- Recommended Next Steps
Overview
The Self-Managed Shippit Carrier Connection allows you to connect your own carrier accounts to CartonCloud. This enables you to book and manage shipments, access live rates and generate shipping labels within CartonCloud using your BYO carrier rates and/or via the walleted rates from Shippit.
Considerations
- You will require a Shippit account. If you do not have one, you can create one during the setup process by submitting a form. See the steps below.
- Carrier Selection Rules allow you to automatically assign the most suitable carrier during packing. These rules will need to be set up once the connection is enabled. See here for details.
- Carrier Account Mapping allows you to define a set of rules that automatically update the Carrier, Delivery Run, and Service Type on a Consignment after a shipment is booked through a Carrier Connection.Carrier Account Mapping will need to be set up once the connection is enabled. See here for details.
- This is a paid integration; please ensure you read the included costs below.
- You need to use the Pack Screen to access Carrier Connections.
Benefits
- Manage all shipments from within CartonCloud - book shipments, compare rates and print labels all from the Pack Screen.
- Streamline the packing process.
- Use your existing carrier agreements and pricing (BYO) or use Shippit’s Prenegotiated Carrier Rates (Walleted Rates).
- Access rate shopping across multiple carriers.
- Avoid paying for a separate Shippit subscription.
- Consolidate workflows into a single system.
Limitations
When configuring Carrier Selection Rules, all carriers and service types available within Shippit are displayed, irrespective of whether those carriers are enabled within your Shippit account(s).
Cost
- No Shippit subscription or label fee. If using Shippit Wallet Carriers and Rates, those will be billed directly to you from Shippit.
- CartonCloud fee per connection. The fee is charged per Shippit Merchant Account, not the number of carriers connected to that account. Please reach out to our Service Desk team for pricing.
How to create a Self-Managed Shippit Carrier Connection
At the Customer level:
- Navigate to Self-Managed Integrations by typing Self-Managed Integrations into the Search for anything.
- Select the Customer you wish to set the integration up for.
- Select Shippit.
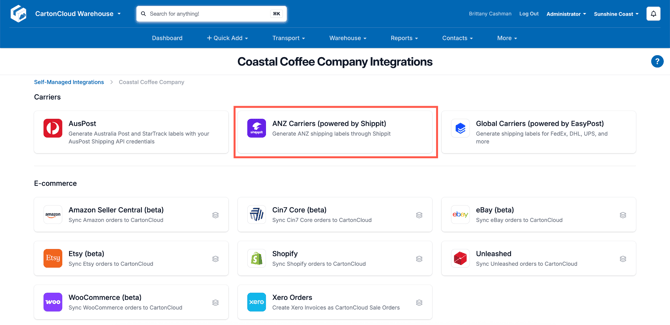
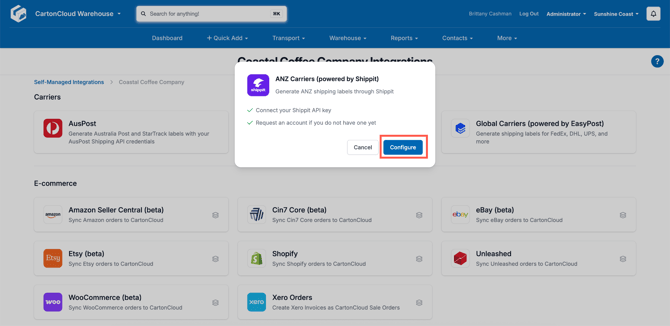
- Select Configure.
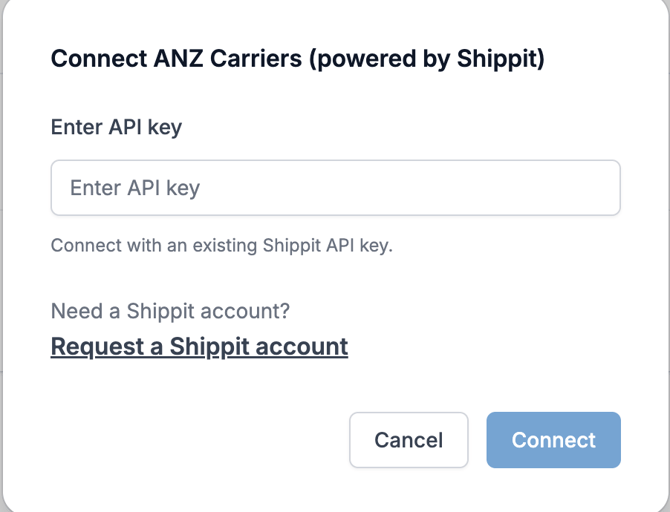
- If you have a Shippit account, enter the API key. If you do not, select Request a Shippit account and fill out the form.
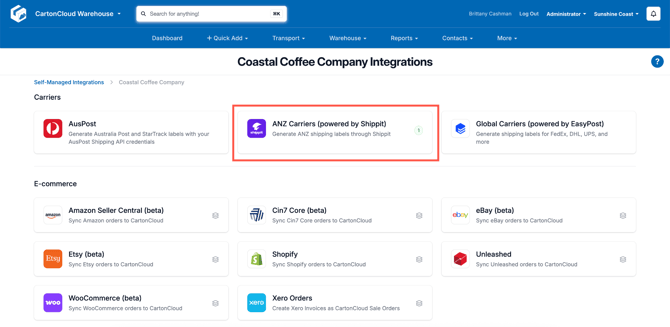
- You will receive a pop-up message confirming the connection was successful. A green number will appear against the Shippit Carrier, indicating the number of accounts connected.
At the Organisation level:
- Navigate to Self-Managed Integrations by typing Self-Managed Integrations into the Search for anything.
- Under My Organisation, select Edit Integrations.
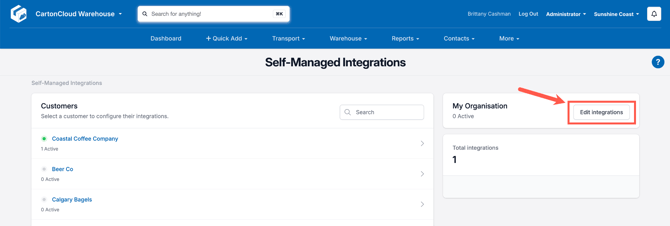
- Select Shippit.
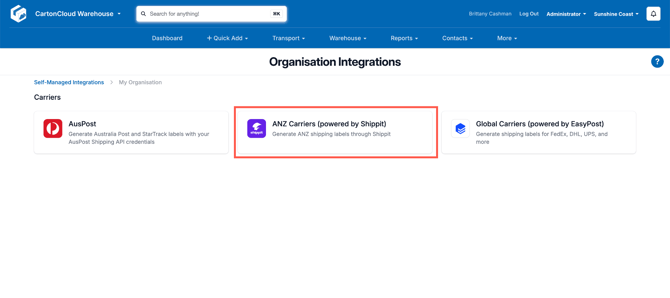
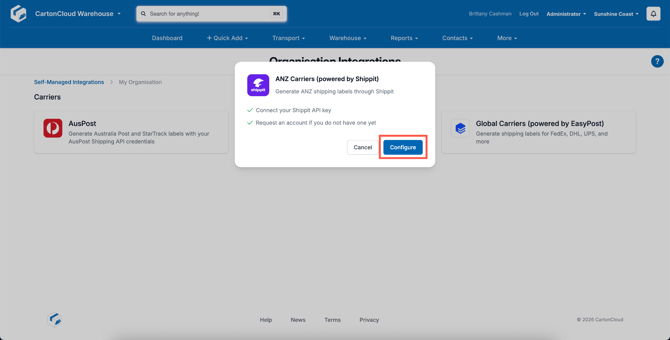
- Select Configure.
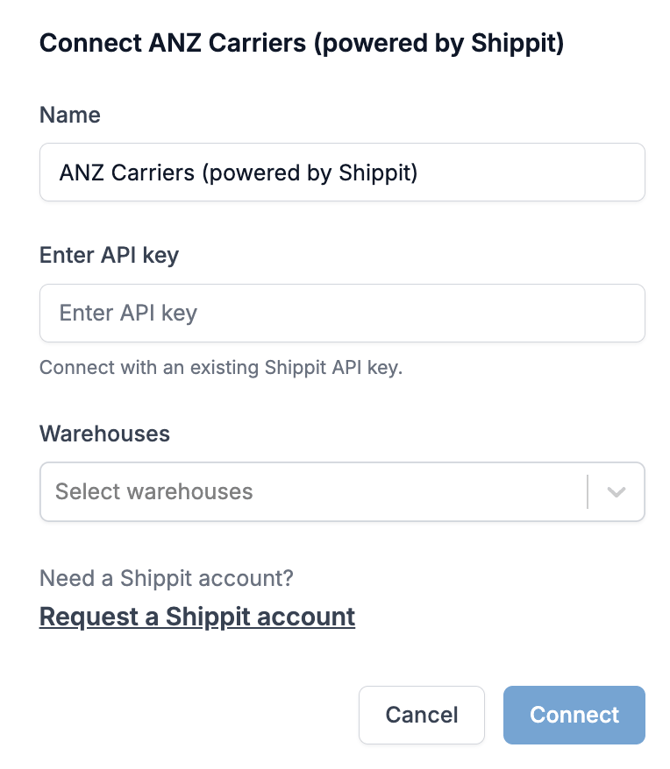
- If you have a Shippit account, enter the API key and select the Warehouses the connection will apply for. If you do not, select Request a Shippit account.
- You will receive a pop-up message confirming the connection was successful. A green number will appear against the Shippit Carrier, indicating the number of accounts connected.
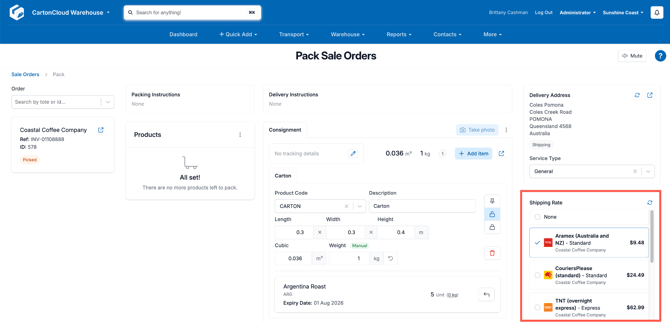
- You will now see shipping rates appear on the Pack Screen when packing orders.
Understanding and Using Shippit
Shippit Account Structure
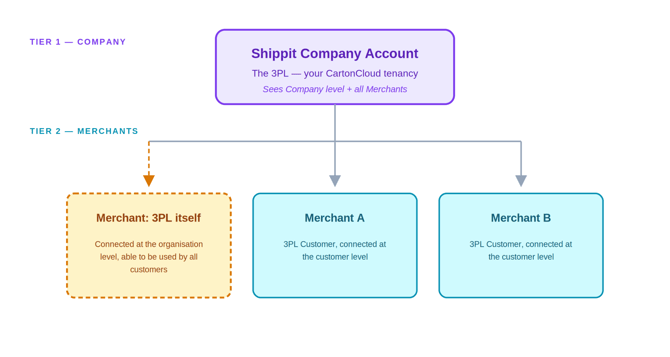
Shippit uses a two-tier account structure made up of a single Company account and one or more Merchant accounts.Carrier connections live at the Merchant level only.
- Company account — represents the 3PL (your CartonCloud tenancy). Users added at this level have visibility across the Company level and all Merchant accounts beneath it. Company accounts do not hold any carrier connections.
- Merchant account — represents each of the 3PL's customers. Each Merchant holds its own carrier connections and rates, and users added at this level can only view their own merchant account. A Merchant account can also be created for the 3PL itself, and connected to CartonCloud at the Organisation Level, providing carrier connections to all customers.
Shippit Merchant Accounts and Warehouses
Each Shippit Merchant account holds a single collection address, so every shipment booked through it must originate from the same physical location. This means a separate Merchant account is required for each shipping location (each Warehouse in CartonCloud) — even when the same merchant operates across multiple warehouses.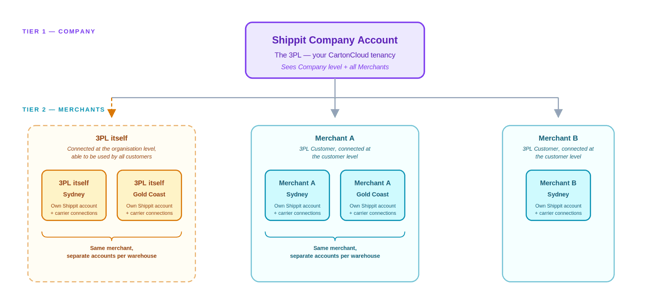
Using Shippit Wallet Rates
When using Wallet rates from Shippit, you will be billed directly from Shippit for these shipments at the end of each week. This is not charged or managed by CartonCloud, and is a direct commercial relationship between Shippit and your company.
Support with Shippit
Please visit the Shippit support site for more information.
International Shipments and Customs Information with Shippit
When the pickup address and delivery address on a Consignment are in different countries, the shipment is treated as international. CartonCloud automatically includes the customs information Shippit requires to quote and book these shipments, using details already recorded against your Products and Sale Orders.
If the pickup and delivery countries are the same, the shipment is treated as domestic and no customs information is sent — rates and booking behave as they do today.
What information is sent to Shippit
For international shipments, CartonCloud builds a customs declaration from the stock assigned to the Consignment during packing, and sends the following details to Shippit:
|
Field |
Source |
Sent on |
|---|---|---|
|
Product description |
The Product's Customs Description, or the Product name if no Customs Description is set |
Rate quotes and booking |
|
Quantity and price |
The quantity and approximate sale price recorded on the Sale Order lines for that Product |
Rate quotes and booking |
|
Harmonised System (HS) Code |
The Product's Harmonised System Code field |
Rate quotes and booking |
|
Country of Origin |
The Product's Country of Origin field |
Booking only |
|
MID Code |
The Product's MID Code field |
Booking only |
|
Incoterm |
The Incoterm recorded on the Sale Order |
Booking only |
If the same Product appears on the Sale Order at more than one unit price, CartonCloud combines these into a single customs line for that Product, using the total quantity and a blended average unit price.
Setting up your customs data
To ensure customs information is sent with your international Shippit shipments, add the following details before packing:
- Country of Origin and Harmonised System Code — set on each Product.
- MID Code — set on each Product using the same Edit Product screen.
- Sale price — entered against each Sale Order line when the order is created.
- Incoterm — set on the Sale Order.
See International Shipping Product Fields for how to add these details to a Product.
CartonCloud does not block a Shippit rate quote or booking if any of this information is missing. Any field that is not set is left off the request sent to Shippit. If Shippit cannot process the request without it, the error appears through the existing carrier rate error on the Pack Screen, the same way other Shippit errors display today.
If no stock has been assigned to the Consignment at the time of packing, no customs information is sent for that shipment.
Disconnecting an existing Self-Managed Shippit Carrier Connection
- Navigate to Self-Managed Integrations by typing Self-Managed Integrations into the Search for anything.
- To disconnect an Organisation level connection, select Edit Integrations.
- To disconnect a Customer level connection, select the relevant Customer.
- Select Shippit.
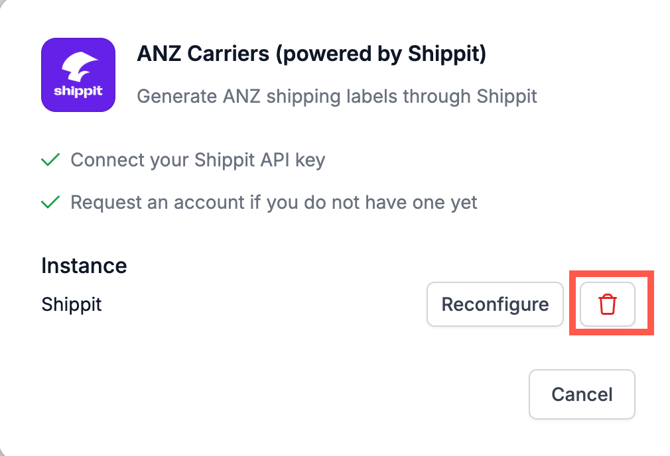
- Select the bin icon to remove the connection.
Recommended Next Steps
- Set up Carrier Selection Rules.
- Set up Carrier Account Mapping.