Table of Contents
- Creating a booking
- Booking Fields
- Moving and resizing
- Cancelling, no shows and deleting
- Statuses and arrival times
- Printing a booking label
- Linking CartonCloud orders
Dock Management is a paid CartonCloud application. Contact the CartonCloud support team for pricing and access.
Creating a booking
From the bookings page, click +Add Booking in the top right hand corner, or click any empty time slot on the calendar to start a booking at that time.
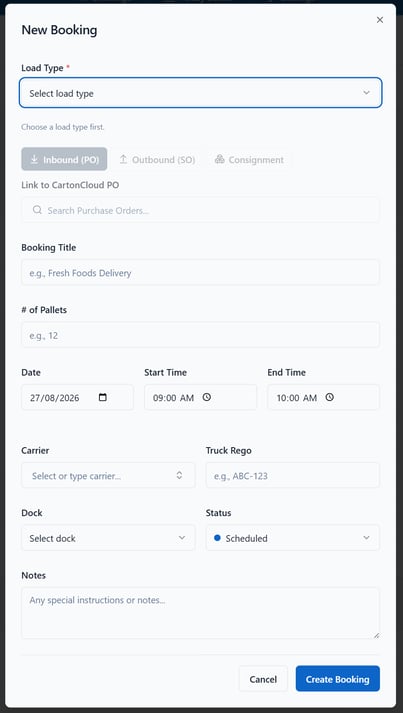
Fill in the essentials — load type, title, pallets, date, time, carrier, rego, and dock. The dock list shows the doors at your currently selected warehouse. No dock (Unassigned) is for bookings you’re not ready to allocate.
A few things happen automatically when you save:
- The booking gets a check-in code (like BK-7XK2M) shown at the top of the booking. Drivers use this code at the kiosk on arrival.
- The booking is assigned to the warehouse of its dock door.
Note that bookings created before Load Types existed show Not set and save normally.
Booking outside working hours? You can — slots outside your configured hours appear greyed on the calendar, and the booking form shows an amber Outside working hours note, but staff are never blocked. (Carriers booking through your booking link are limited to working hours.)
Booking Fields
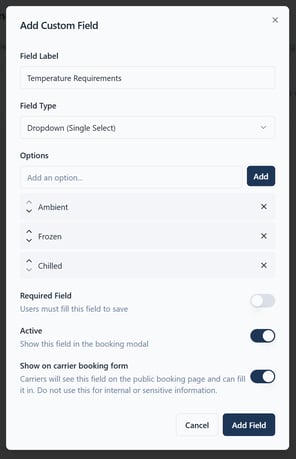
Each booking field can be shown on the carrier booking form.
To find add booking fields, go to Settings > Booking Fields and click +Add Field. Edit the field and switch on Show on carrier booking form.
Carriers will see the field and can fill it in, so don't use it for anything internal. Fields are staff-only until you switch this on.
If the field is also marked required, carriers can't submit a booking without completing it.
Moving and resizing
- Drag a card to move a booking to a different time or dock.
- Drag the bottom edge to extend or shorten it in 15-minute steps.
- Drag a booking into the Unassigned lane to take the dock off it without losing the booking. You can also pick No dock (Unassigned) in the dock list inside the booking.
Cancelling, no shows, and deleting
Cancelling
Open a booking and click Cancel booking to cancel it.
The booking stays on the calendar marked as Cancelled, so you keep the history, and the carrier can be notified automatically if you’ve turned that on under Settings > Notifications.
No show
If a truck never turns up, that is not the same as a booking someone cancelled, and your reporting should not treat it the same way.
Open the booking and choose Mark as no show from the dropdown beside Cancel booking. This is only available while a booking is still Scheduled, because a truck that has already been marked arrived cannot be a no show.
The booking stays on record, with the time it was marked, and the slot is freed so someone else can book that dock and time. Nothing is sent to the carrier.
If the vehicle turns up after all, open the booking and set it back to Scheduled.
Admins can also permanently delete a booking from the dropdown beside that button. Deleting removes the booking and its attached documents for good, and sends nothing to the carrier — it’s meant for tidying up test or duplicate bookings, not for cancellations. If the truck has already been marked as arrived, deleting will also remove its arrival time from your reporting.
Statuses and arrival times
A booking moves through: Scheduled → Arrived → In Progress → Completed → Departed. A booking can also end as Cancelled or No Show, which both take it out of the running schedule. Completed means unloading has finished but the vehicle or container is still on site and the dock stays allocated. Departed means it has left.
When the status becomes Arrived — whether a driver checks in at the kiosk, or staff click Mark Arrived manually against the booking — the arrival time is stamped automatically and shown on the card and in the booking. This powers your on-time performance reporting, so encourage the team to mark arrivals as they happen rather than after the fact.
The booking also records how the arrival was captured: Kiosk (driver self-check-in) or Staff.
Printing a booking label
Open a saved booking and click the printer icon in the footer to print a label for the dock or the paperwork.
The label is sized for 4x6 inch (100x150mm) stock, the same labels most Zebra printers are already loaded with, and carries the booking reference, title, date, time and dock. Send it straight to a label printer, or save it as a PDF from the print dialog.
The label always shows the booking as it is saved, so save your changes before printing.
Linking CartonCloud orders
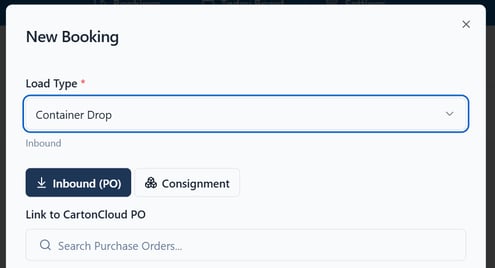
Bookings can be linked to CartonCloud records directly from the booking form, with three link types:
- Purchase orders for inbound bookings
- Sales orders for outbound bookings
- Consignments for either direction — and a booking can carry more than one
Linked bookings show the CartonCloud icon on the calendar, and the record references appear in the booking details — so the team always knows what stock is on the truck. Unplanned deliveries can stay unlinked; linking is optional.
To link an existing record in CartonCloud to a booking in Dock Management, please follow the below steps;
-
Select the booking
-
Select the correct entity (Purchase orders, Sales orders or Consignments)
-
Search the Customer Reference of the associated record
-
Select the record