Table of Contents
- Navigation to wave picking by location
- Android
- iOS
- Location sorting
- Printing product labels by location
- Location pick sheet
- Product quantity confirmation view
- Completing a product pick
- Printing product labels
- Complete picking & leaving the location pick sheet view
Navigation to wave picking by location
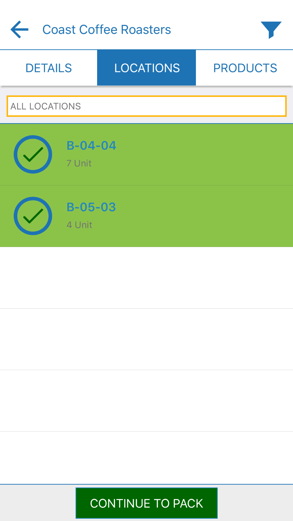
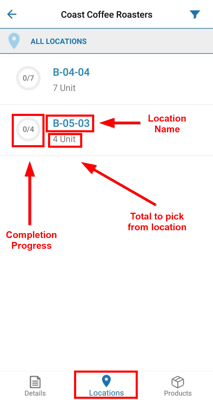
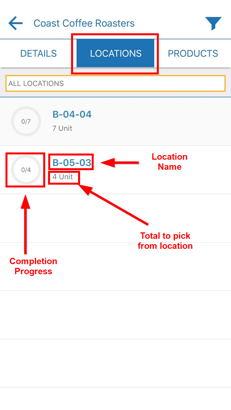
On selecting the Locations tab after choosing to enter the Pick mode for a Wave Pick, required product numbers will be displayed aggregated by Warehouse Location.
Android
iOS
Location Sorting
Warehouse locations within the Locations tab can be sorted
-
Alphabetically: A-Z
-
By Pick Efficiency
-
By Pick Order
Android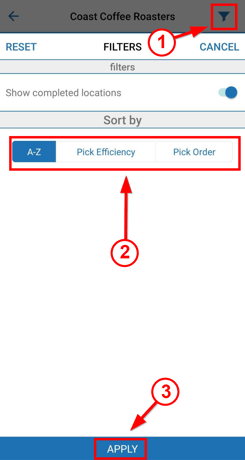
iOS
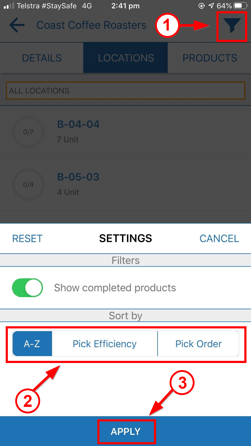
Simply select the filter button from the top bar, choose the preferred sorting method and select Apply.
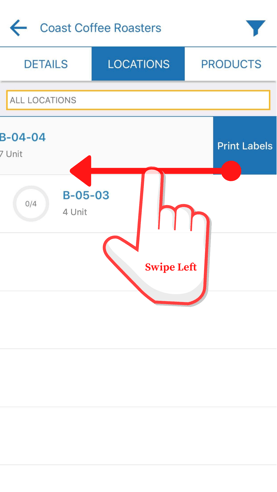
Printing product labels by location
To print all product labels associated with a location, simply swipe on the desired location in the location list and select Print Labels.
Android 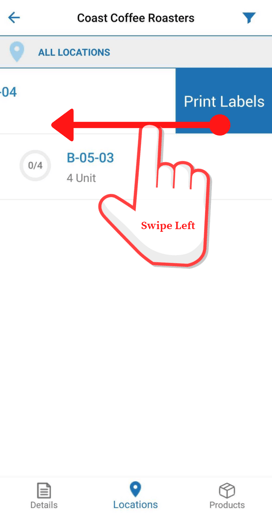
iOS
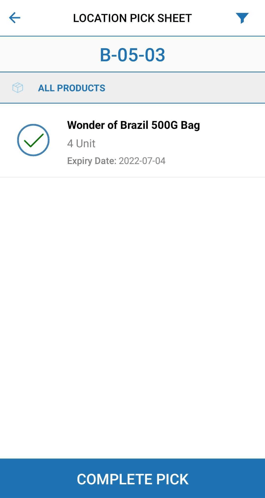
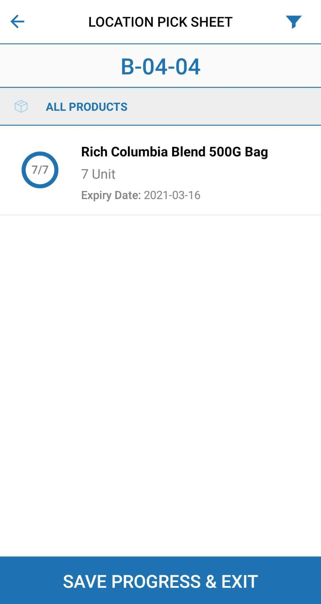
Location pick sheet
On either manually selecting a location from the list, or by scanning a barcode associated with a unique location in the list, a Location Pick Sheet will be displayed.
Android 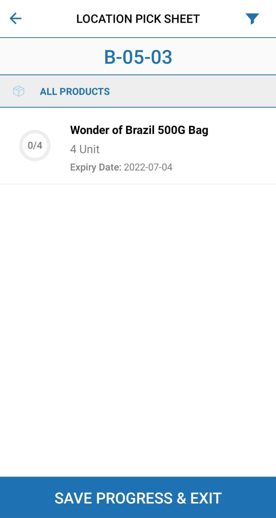
iOS
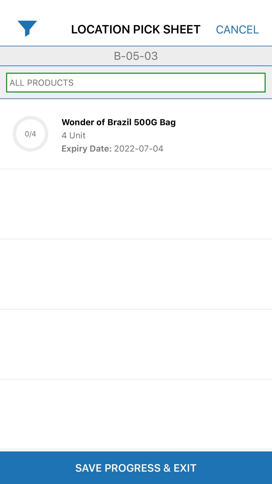
The Location Pick Sheet lists all the Wave Pick products to be picked from the selected location. Picked quantities for these products can either be confirmed by selecting them from the list and confirming their quantity in the Product Quantity Confirmation View (see below), or by scanning a related Product UOM barcode.
Products are aggregated by product type, expiry date and custom fields.
Product Quantity Confirmation View
The Pack Confirmation View will either be automatically opened on scanning/entering a product barcode while in the Location Pick Sheet or is opened after tapping on a product in the list.
Within the Pack Confirmation View relevant information about the product is being displayed: warehouse location, product name, expiry date, base unit of measure and custom fields. Custom fields are initially hidden but can be expanded by tapping on the "Show Custom Fields" text.
For more information on how the quantity confirmation view displays information, check out this article: Scan Picking Process - Pack Confirmation View
Android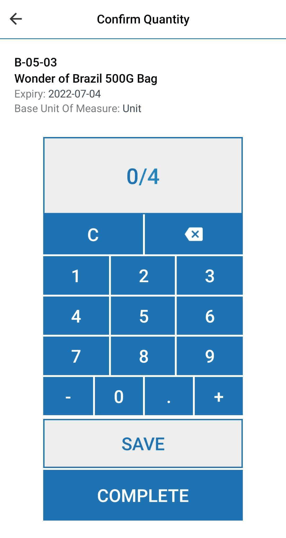
iOS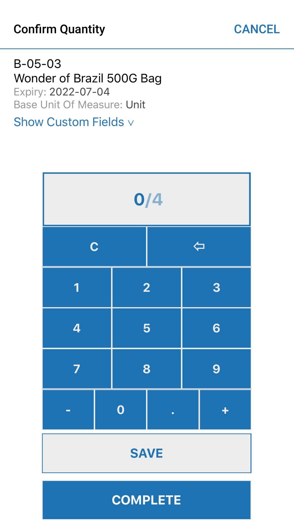
On selecting Save, the pick quantity information will be stored without attempting to complete the pick for this product. The user can return to this product at a later stage, pick more products and complete the product pick.
On selecting Complete, the pick quantity information will be stored and the product pick completed, meaning no future alterations to the pick quantity can be made.
Android
Saved Quantity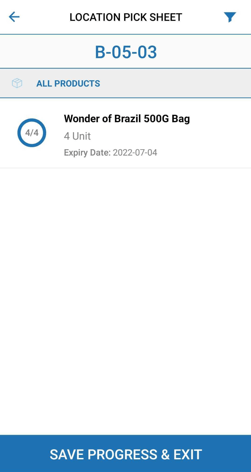
Completed Product
iOS
Saved Quantity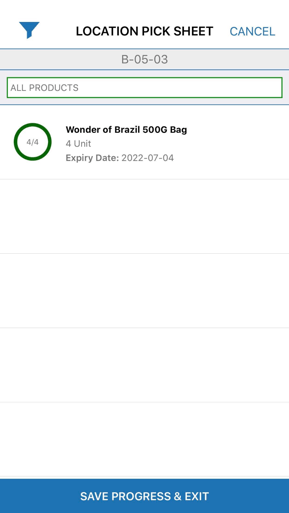
Completed Product
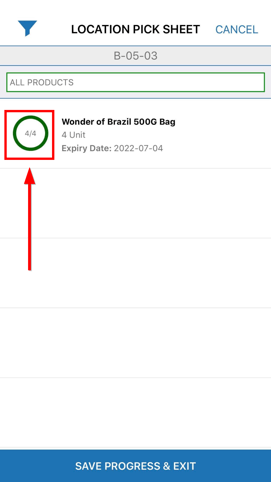
Completing a Product Pick
If a product pick is not completed in the Product Confirmation View, it can be completed from the Location Pick Sheet itself, by swiping on the desired product in the list and selecting Complete. A requirement for this option to be available is that the correct quantity of the product has previously been saved as picked.
iOS
Required Quantity Picked
Complete Product Pick
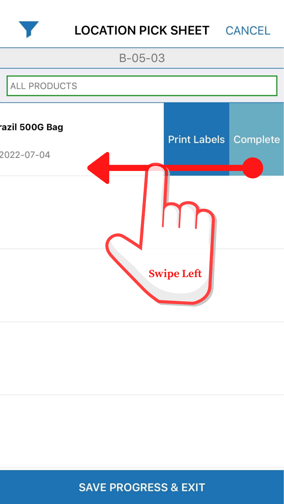
Completed Product Pick

Android
Required Quantity Picked
Complete Product Pick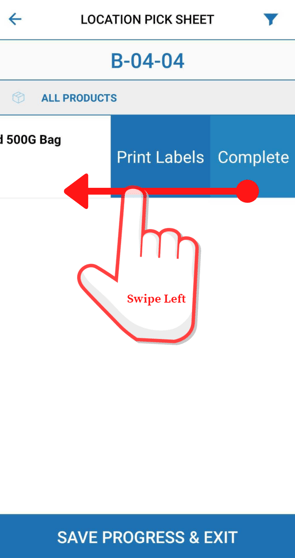
Completed Product Pick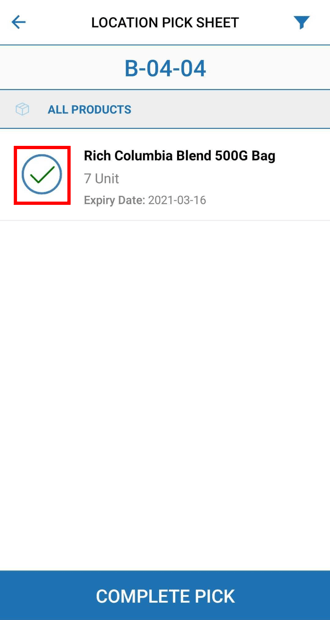
Printing Product Labels
To print all product labels for a product in the location pick sheet, simply swipe on the desired product in the list and select Print Labels.
Android
iOS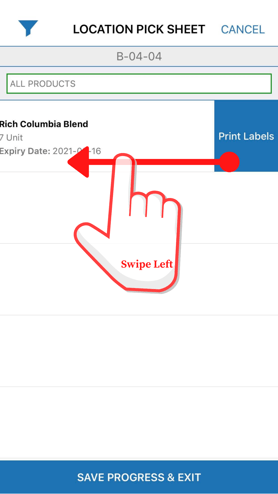
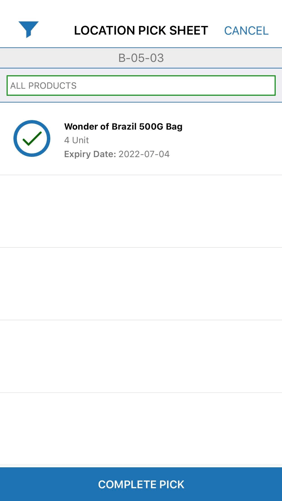
Complete Picking & Leaving the Location Pick Sheet View
Once all products on the Location Pick Sheet have been completed, the Continue to Pack button will take the user to the pack process.
Android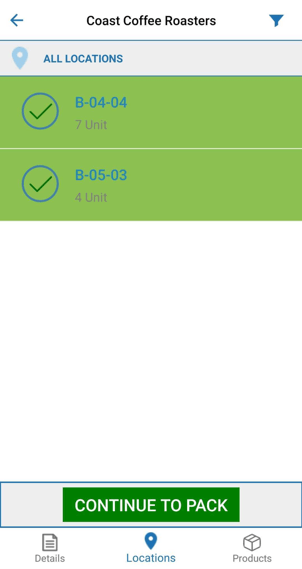
iOS