Table of Contents
- Purpose
- Workflow Overview
- Workflow Use Cases
- Benefits
- Prerequisites
- Considerations
- How to set up tote barcodes
- Completing a Pick to Tote Wave Pick on the Mobile App
- How to Video
Purpose
Pick to Tote streamlines warehouse efficiency by enabling pickers to fulfil multiple orders simultaneously, sorting items directly into totes as they navigate the warehouse.
Pick to Tote is included in all warehouse plans; however, Wave Pick Auto Generation (Advanced Automation, which enables automated wave pick generation is only included within WMS Premium. Please reach out to our team here if you would like more information on WMS Premium.
Workflow Overview
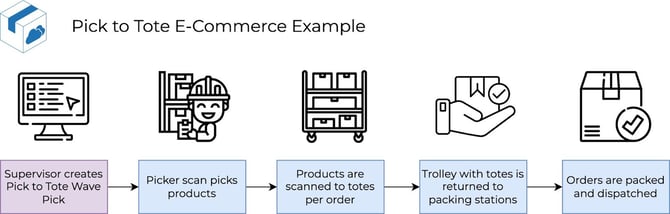
Pick to Tote is a picking workflow designed to reduce the time spent picking. This is achieved by allowing pickers to pick multiple orders (usually 10-30) simultaneously, sorting them into totes as they go. This reduces the total walking time through the warehouse and the speed of the picking process. After picking, the trolley containing the totes is wheeled back to a packing station where the packing is completed. The Pack Screen can be utilised to complete the packing step.
Workflow Use Cases
This workflow is designed for e-commerce operations that have high-volume orders with a small number of SKUs on each order.
It is recommended that Pick to Tote is used in conjunction with the Pack Screen for a more optimised and efficient workflow.
Benefits
-
Increased order accuracy, by attributing the product to the correct order as soon as the product is picked from the shelf, reducing the risk of products being packed with the wrong order.
-
Pick to Tote enables a more efficient picking process by allowing warehouse workers to pick multiple orders at once, while moving through the warehouse in a single trip, avoiding multiple trips and retracing steps to fulfil orders.
-
Increased flexibility within Wave Picking as Pick to Tote supports an additional picking workflow to support different warehouse and business requirements.
-
Ensures faster fulfilment and increased productivity.
Prerequisites
-
A Pick to Tote Wave Pick must first be created before it can be actioned and completed on the mobile or web app. See here for steps on how to create a Wave Pick.
-
Totes on a trolley with barcodes to be scanned during picking.
-
Tote barcodes are set up correctly. See How to set up Tote barcodes for more information.
-
Scanners are required for Pick to Tote.
Considerations
-
The mobile app must be used when picking a Pick to Tote Wave Pick, however, either the web app or mobile app may be used for the packing process. If packing from the web app, it is recommended to use the Scan Order / Tote screen. Scanning the tote barcodes will jump you straight into the web app pack screen for the order.
-
It is recommended that the totes utilised are all the same size. Currently, in CartonCloud there is no way to direct the order to a certain tote based on the order size.
How to set up tote barcodes
Pick to Tote requires barcoded totes to be scanned during the picking process. In order to determine what barcode is a tote barcode, there is an Organisation Setting ‘Reqex for Tote Barcode Validation” which controls the validation for what is a valid tote barcode.
By default, CartonCloud supports tote barcodes in the following format:
[Trolley #] [Tote Colour] [Tote #]
Eg:
1 Yellow 1
1 Blue 3
For example, following that format, assume you have a trolley with 5 levels and 5 totes per level, with each level containing different coloured totes, this is the suggested naming convention:
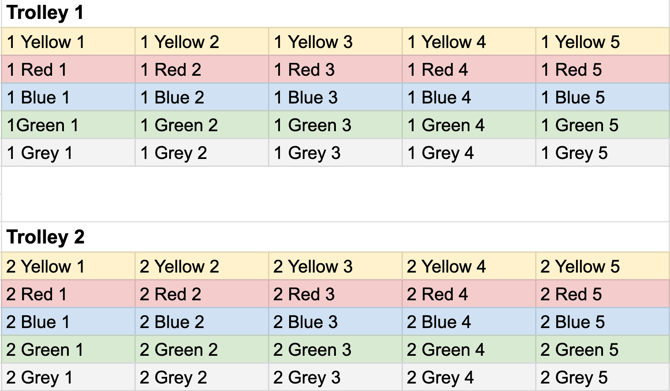
Barcodes following this naming convention have been created here. However, should you wish to create your own, barcodes can then be generated using tools such as https://barcode.tec-it.com/en/,
If you wish to use a different format to the one mentioned above you can change the regex by:
-
Navigate to Organisation Settings, More>Organisation Settings.
-
Select the Warehouse tab.
-
Scroll down to Mobile App Configuration and Reqex for Tote Barcode Validation.
-
Select Edit.
-
Add a name and the regular expression (regex).
-
Select Save.
-
Create barcodes for the format you have created.
Completing a Pick to Tote Wave Pick on the Mobile App
-
From the Switch Mode screen, select Wave Picking.
-
Select the relevant Pick to Tote Wave Pick. Note, that the Wave Pick type will be shown in red above the Wave Pick name.

-
Select Pick.

-
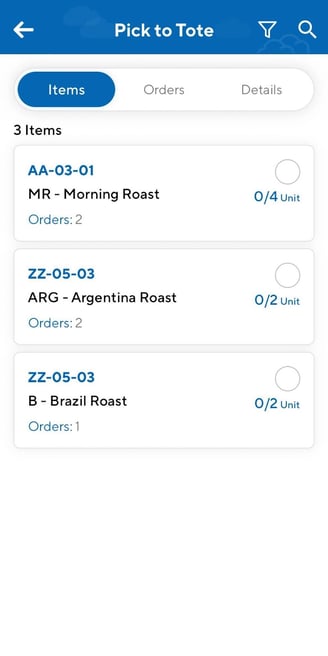
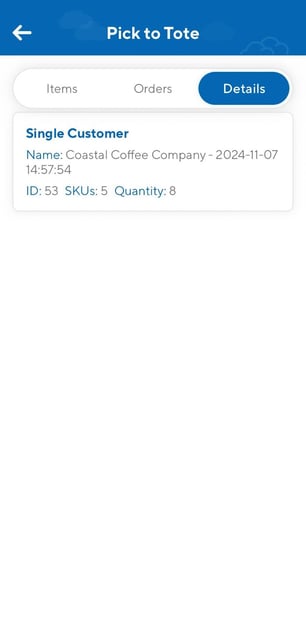
The Pick to Tote screen has three different views:
-
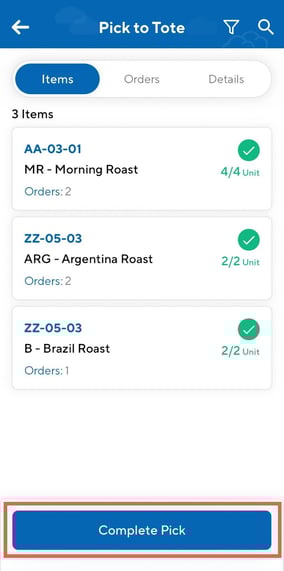
Items: the products on the Wave Pick
-
-
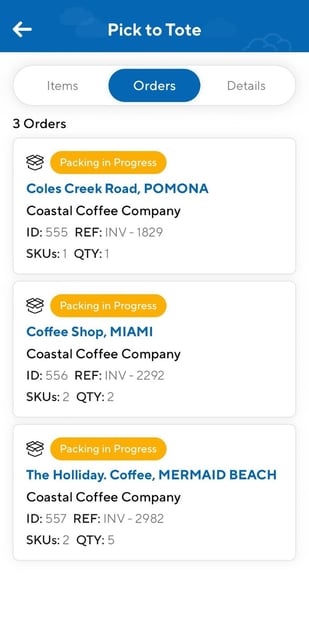
Orders: the orders on the Wave Pick
-
Details: the details of the Wave Pick
-
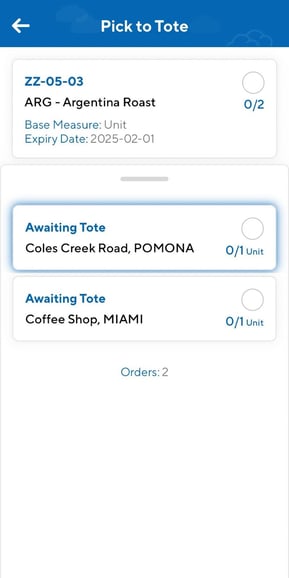
To start picking the products you can scan either the product or warehouse location barcode. Alternatively, you can tap into the product.
-
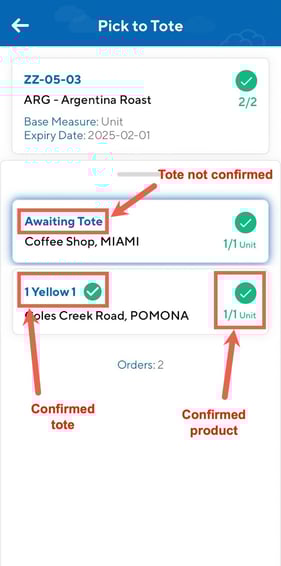
This will then show the product and the orders it is required for. Scan either the product or tote barcode to assign the product to the tote. You can scan the product or the tote barcode first, however, both have to be confirmed to confirm the pick into the tote. The product can either be scanned or confirmed using the quantity confirmation page by tapping into the product. However, the tote must be confirmed by scanning the tote barcode.
-
If you wish to pick an alternative order first, simply select it from the list and the list will reorder.
-
Until a Tote is assigned to that order the order will show as Awaiting Tote and if the product’s order already has had a tote assigned from a previous product the tote will show and not allow you to assign a different tote.
-
Continue with all products on the Wave Pick.
-
Once all products have been picked into their respective totes, select Complete Pick.
-
You will be prompted to continue with the pack step on the mobile or back to the Wave Pick List where the pack step can either be completed at a later stage on the mobile or to be completed on the web app. It is recommended that the pack step be completed on the web app via the Pack Screen.
-
If completing the pack on the mobile, select the order to pack and follow the steps here. If completing the pack on the web app, use the Pack Screen and follow the steps outlined here.