Table of Contents
- Purpose
- Impact of enabling data recording on receival
- Enabling or disabling the recording of receival data
- Configuring the Receival Fields to Record Data
- Adding New Fields
- Deleting Existing Fields
- Making A Field Required Or Optional
- Showing Or Hiding A Field
Purpose
These settings enable or disable the ability to record data on a Manifest or Purchase Order and allow configuration of the fields to be recorded when updating a status.
Impact of enabling data recording on receival
When the Record Data At Receival setting is checked, clicking on the Update to In Warehouse button in Manifest or the Update Status to Received button in a Purchase Order will bring up a popup with fields to be filled in before updating the status.
In the case of the Manifest: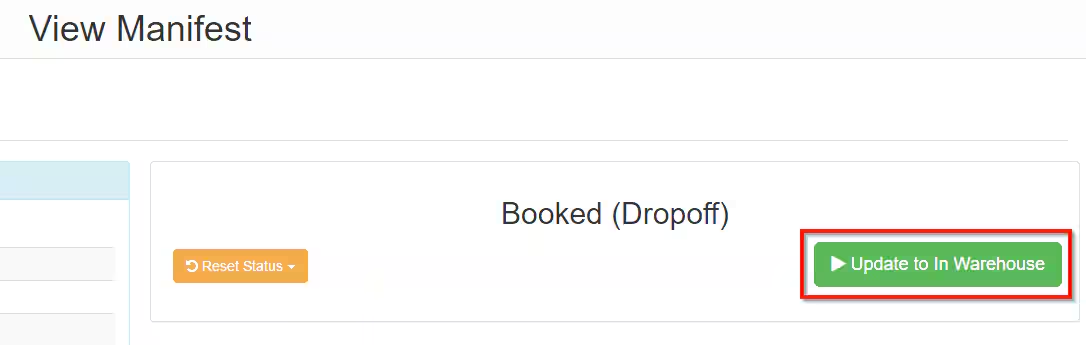
In the case of the Purchase Order:
The popup that appears when clicking on the above buttons with the Record Data setting enabled:

The data that is entered into the fields appears in the history tab of the Manifest or Purchase Order after the data is submitted.

Enabling or Disabling the Recording of Receival Data:
To turn data recording on:
-
Tick the checkbox named Record Data at Receival in the Receival Fields tab of Organisation Settings.
-
Click the Save button just underneath the setting
To turn data recording off:
-
Untick the checkbox named Record Data at Receival in the Receival Fields tab of Organisation Settings.
-
Click the Save button just underneath the setting

Configuring the Receival Fields to Record Data
This section covers how to configure what fields appear when recording data is enabled. To configure the fields click on the Receival Fields tab.
All configuring is done through the Receival Custom Fields table:
Adding New Fields
To add a new field to record data for:
-
Click the Add Field button which will create a new row at the bottom of the table
-
Fill in the Name field and set the required and enabled options as desired. By default any new field is required and enabled
-
Click the green Save button under the table

Deleting Existing Fields
To delete a field from the existing fields:
-
Click on the Minus [-] button that appears on the right of each table row for the field that is to be deleted
-
Click the green Save button

Making A Field Required Or Optional
To make a field required or optional in the popup:
-
Change the Required field in the table for the desired row to be Required or Optional
-
Click the Save button

It should be noted that if a field is Optional and no data is entered when submitting then no record for that particular field will be shown in the History tab for the given Manifest or Purchase Order.
Showing or hiding a field
To make a field appear or disappear in the popup:
-
Change the Enabled field in the table for the desired row to be Enabled or Disabled
-
Click the Save button

If a field has the Enabled setting set as Disabled, then the field will not appear in the popup when updating a Manifest or Purchase Order.