Table of Contents
Purpose
The process for adding and capturing photos and Documents on Purchase Orders during the inbound process on the mobile app.
Prerequisites
-
Use a mobile device with a built-in camera. If not, take photos on another device, then send them to your mobile device to upload via the Library option or use the web app for upload.
-
Allow the CartonCloud app access to your Camera and Photos on your mobile device. You will be prompted to do this when you first use the Document feature on your mobile device.
-
If you would like your Customer to be notified when Documents are uploaded against a Purchase Order ensure they are set up with Purchase Order Verified and Allocated notifications. These notifications will include Documents if they have been uploaded and are a Shared with Customer visibility level. See Customer Settings - Email (Notifications) for more information.
Use Cases / Benefits
-
Take photos of stock as it is received in the warehouse.
-
Record damages at the time stock is received.
-
Provide greater transparency and updates to your customers on their stock.
-
Provide greater transparency internally with photo visibility supplied at the time of receipt or damage and document history for who uploaded the attachment.
-
A more advanced inbound process providing greater service and value to your customers.
Process
From the mobile app, you can add documents to Purchase Orders until the Purchase Order is allocated.
Adding Documents to Purchase Orders on Inbound
-
Navigate to the Putaway mode on the mobile app.
-
Select the Purchase Order you wish to receive.
-
Documents can be added at any stage throughout the inbound process until the Purchase Order is in a status of ‘Allocated’.
-
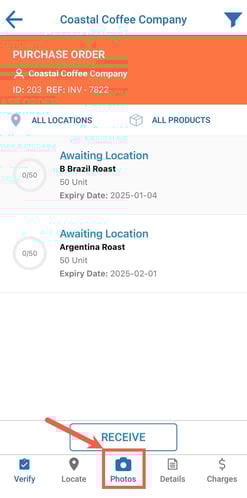
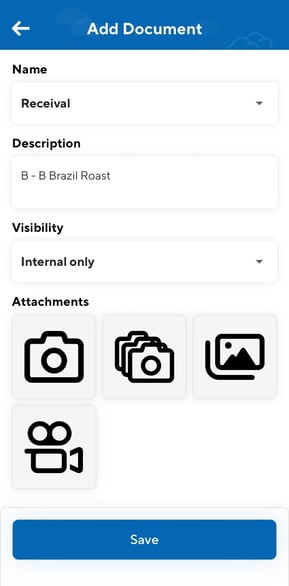
To add a Document, select the Photos button at the bottom of the screen.
-
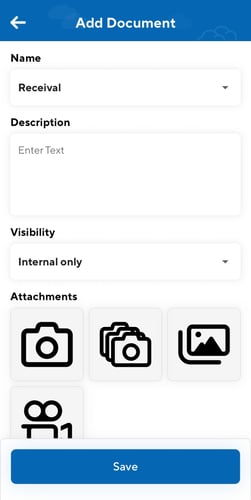
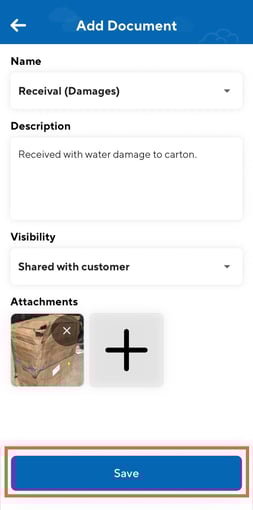
Select the Name for the Document from the drop-down. Note that names are not customisable, however, they will be in the future.
-
Receival: use this name when receiving stock that is not damaged.
-
Receival (Damages): use this name when receiving damaged freight.
- A default visibility option can be selected from the Organisation Settings. For more information click here.
-
-
Enter information related to the Document within the Description text box. This will be visible to anyone who has access to the Document.
-
Select the visibility option: (a default visibility option can be selected from the Organisation Settings. More information here)
-
Internal only: only internal users of your CartonCloud account will be able to see the Document. This includes all User types apart from Customers. Only Admin and Packers can edit the Document.
-
Shared with Customer: all user types in your CartonCloud account including Customers can see the Document. Only Admin and Packers can edit the Document.
-
-
Upload the attachment using either:
-
Single capture: take one photo using the camera on the device.
-
Multi-capture: rapidly take multiple photos without having to close and reopen the camera.
-
Video: record a video to upload using the camera on the device. By default, sound is turned off when recording the video however, you can turn this on when recording the video.
-
Library: access attachments saved to your device to upload to the Document.
-
-
As the attachments upload to the Document, do not leave the screen as they will not save.
Note, that you do not have to upload an attachment when creating a Document. You can choose to add this at a later stage from the web app.
-
If you wish to add more attachments select the plus icon next to the attachment you just uploaded.
-
Select Save once you have finished uploading the attachments.
- You will now be able to see the Documents and the associated attachments against the Purchase Order on the web app.
Adding Documents from Purchase Order Products view
You can add Documents to the Purchase Order from the Purchase Order Product view.
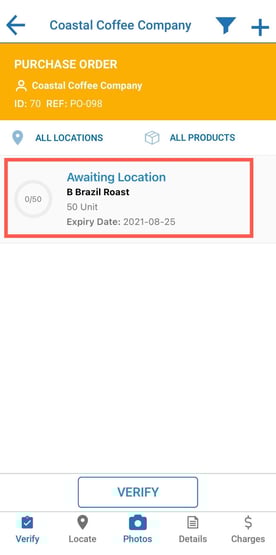
- From within the Purchase Order, click on a product line (the Purchase Order Product).
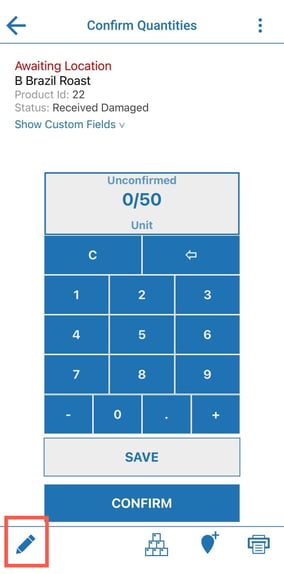
- Select the edit pencil icon.
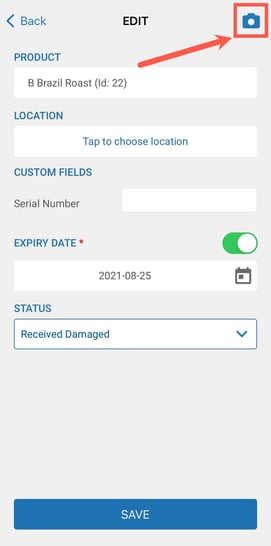
- Select the camera icon in the top right corner. Alternatively, if you update the status of the Purchase Order Product you will be prompted to confirm if you would like to add a Document.
-
Select the Name for the Document from the drop-down. Note that names are not customisable, however, they will be in the future.
-
Receival: use this name when receiving stock that is not damaged.
-
Receival (Damages): use this name when receiving damaged freight.
-
-
Enter information related to the Document within the Description text box. This will be visible to anyone who has access to the Document. The description will be pre-filled with the product code for the Purchase Order Product you have selected.
-
Select the visibility option:
-
Internal only: only internal users of your CartonCloud account will be able to see the Document. This includes all User types apart from Customers. Only Admin and Packers can edit the Document.
-
Shared with Customer: all user types in your CartonCloud account including Customers can see the Document. Only Admin and Packers can edit the Document.
-
-
Upload the attachment using either:
-
Single capture: take one photo using the camera on the device.
-
Multi-capture: rapidly take multiple photos without having to close and reopen the camera.
-
Video: record a video to upload using the camera on the device. By default, sound is turned off when recording the video however, you can turn this on when recording the video.
-
Library: access attachments saved to your device to upload to the Document.
-
-
As the attachments upload to the Document, do not leave the screen as they will not save.
- Select Save once you have finished uploading the attachments.
- You will now be able to see the Documents and the associated attachments against the Purchase Order on the web app.
Uploading photos and documents in the background
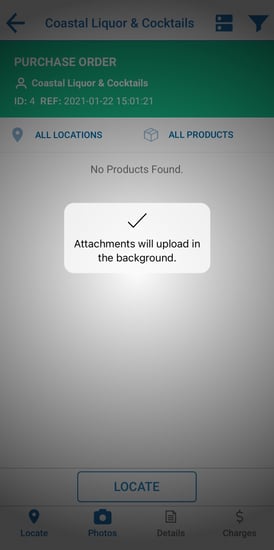
When uploading photos and documents to Purchase Orders the files can be uploaded in the background whilst you continue processing the order.
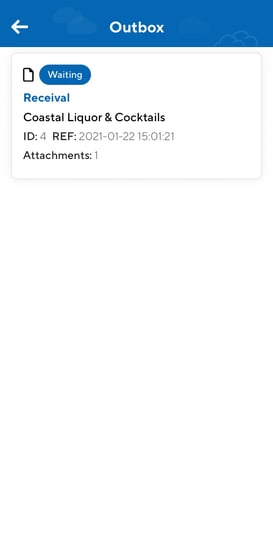
You will be notified that the file is uploading in the background:
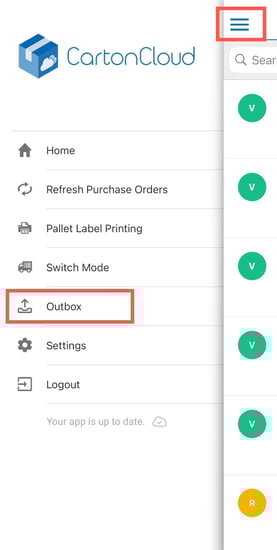
To check progress on the upload or to retry failed uploads you can use the Outbox feature. To access this feature be sure you are in the Wave Picking mode, select the side navigation and then select Outbox.